Create a New Infusionsoft Campaign
If you already have a campaign, then you can skip to the next section.
- Login to Infusionsoft
- Click the account you wish to manage
- Go to Campaign Builder (hover over the icon at the top left of the screen and you should see a dropdown with a lot of options – find and click Campaign Builder)
- Click Create My Own Campaign
- Complete the fields to create a new campaign
- Drag-and-drop the Web Form Submitted widget from the Goals section to the campaign (the main grid section on the right of the screen)
- Now we’re going to setup a “thank you page” that people will get redirected to after they opt-in to your list
- Click the Thank You Page tab
- Click the Thank You Page To Display dropdown and choose Web Address
- Add the full URL to your thank you page. If you haven’t created a thank you page yet, go to the back-end of WordPress, go to Pages > Add New and create a new page. We recommend you call it something obvious like “Thanks for signing up to my whatever list” and then Publish the page Once you publish that page, edit the slug by clicking the little Edit button under the page title in the Permalink section and make the slug something simple like “thanks” so that your permalink is http://yoursite.com/thanks. Copy the full permalink for your thank you page and paste it over in the Thank You Page To Display > Web Address field in Infusionsoft
- Okay, now let’s save your form. Find the toggle button at the top-right of the screen that says “Draft” and click this button to change it to “Ready”
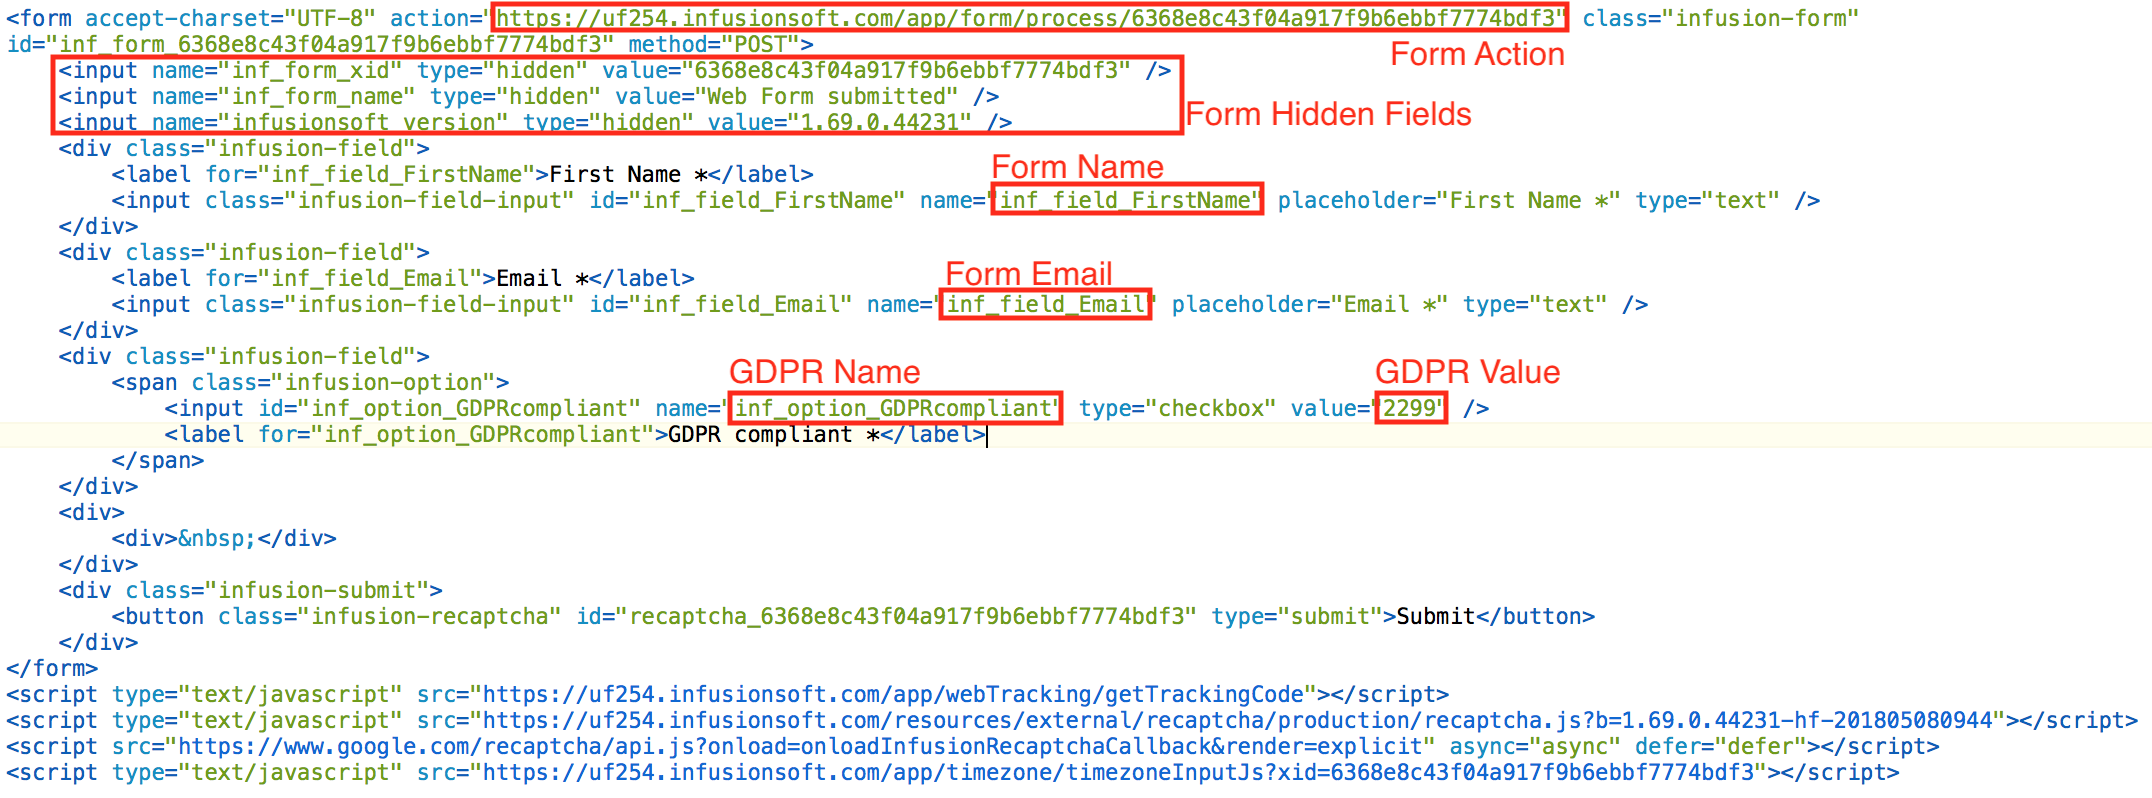
Scary Form Code Tab – It’s really not that scary, we promise. Please follow these steps to get the appropriate info from your Infusionsoft list and enter it into the fields in the Scary Form Code tab. We’ve also attached two screenshots to give help make it a little easier to see exactly what you’ll want to copy and paste from Infusionsoft to WordPress.
- Open your Infusionsoft campaigns and edit the campaign for the opt-in you’re working on
- Double-click the goal for the form that you want to connect to (if you have multiple goals with forms, make sure you are clicking the right one)
- If you haven’t done so already, click the Publish button (top right) to save and publish your new form
- Click the Code tab (just above the form editor)
- Check HTML Code (unstyled)
- Copy the HTML code you see in the “Paste the following code…” section
- Paste that HTML code into an empty document on your computer (you can just paste it into something like Word, Apple Pages, a Google doc, etc.)
- In your site, get back to the Scary Form Code tab for your new opt-in and in these fields, paste the appropriate values for Form Action Code, Form Hidden Fields . Note: We’ve highlighted exactly what you need to copy and paste in the screenshot below
^^ Just copy over the “Form Action” and “Hidden Fields” sections. You can ignore the rest for now.

