MadMimi
Create a new form
- Login to your Mad Mimi account
- Click Webform
- Click Add A Webform
- Customize the general details (webform name, confirmation details, etc.)
- In the “Add subscribers to this list” dropdown, choose one of your lists where people will get added once they subscribe to this opt-in
If you want to add a GDPR checkbox
- While still editing your form in Mad Mimi, click the “Add a field” dropdown in the Gather The Following Info section
- Click Fancy Fields
- Choose Checkboxes as the field type and click Continue
- In Field Label, type something like “GDPR Compliance”
- Click to save your new fancy field
- In the Enter an option input field that is now on your form builder, click inside the input field and enter something like “I agree to GDPR terms” and click the checkmark to save the option
- Refresh your page page after the form saves
Add a custom thank you page
- While still editing your form in Mad Mimi, click the Advanced tab
- In the Confirmation Landing Page field, enter the full URL to your custom thank you page on your site. If you haven’t created a thank you page yet, go to the back-end of WordPress, go to Pages > Add New and create a new page. Once you publish that page, copy the URL of the page and paste it over to your Confirmation Landing Page field for your Mad Mimi form
Get HTML Code for your form
- While editing your form in Mad Mimi, click the Embed tab, click Plain Embed, copy all of the scary HTML content inside of the HTML section and paste this code into an empty plain text editor on your computer (you can just paste it into something like Word, Apple Pages, a Google doc, etc.)
- Now, jump back to your edit screen for the opt-in you are creating
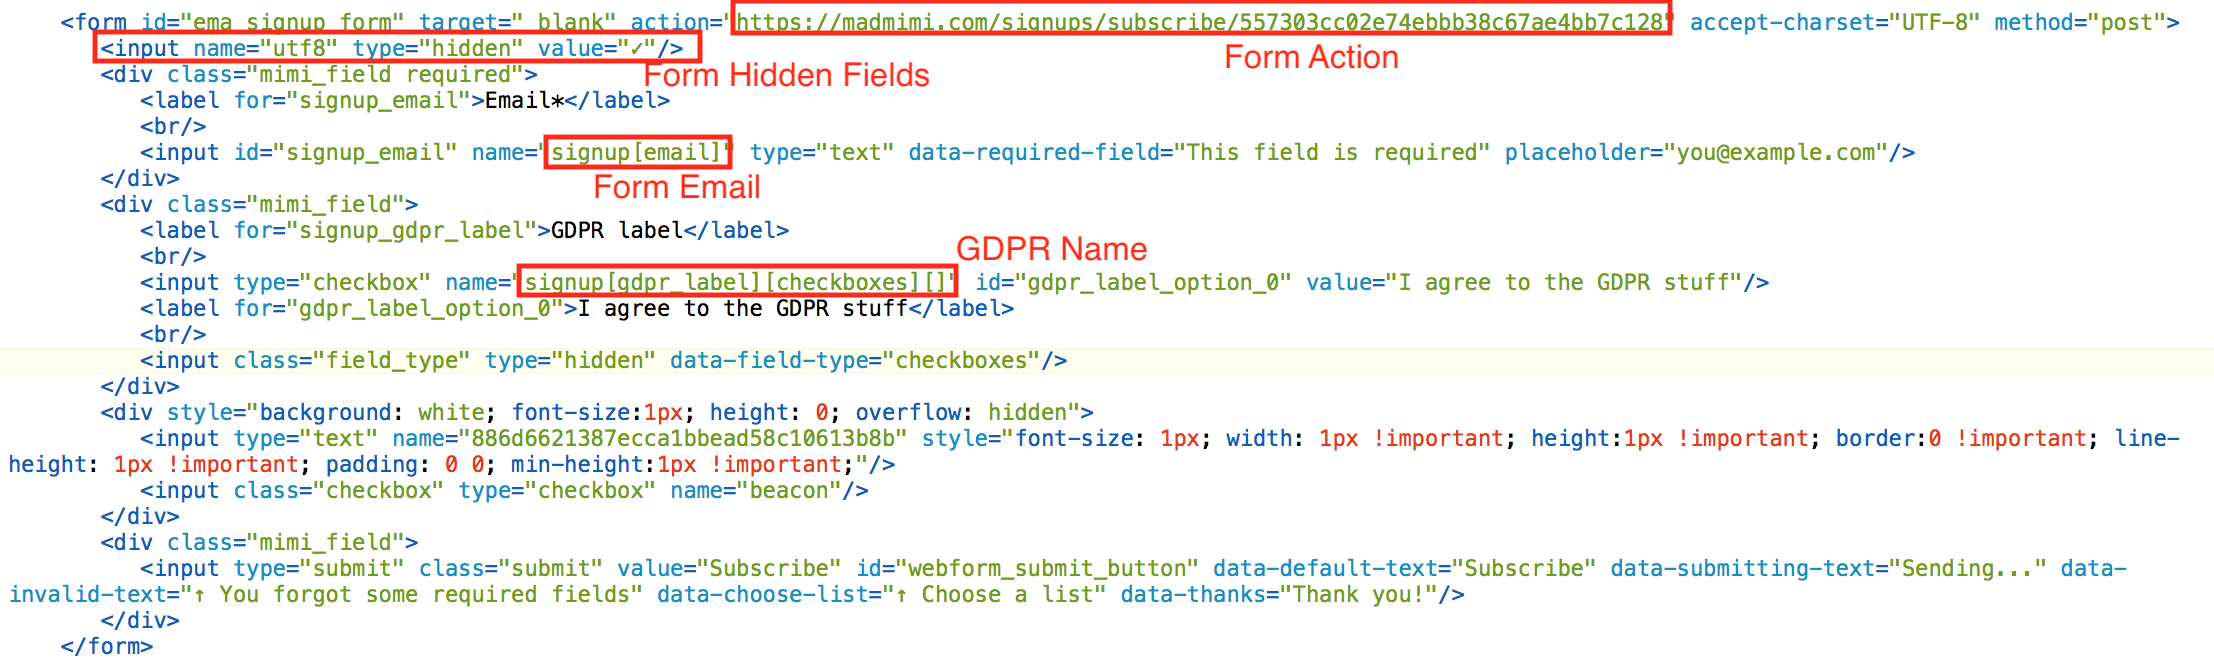
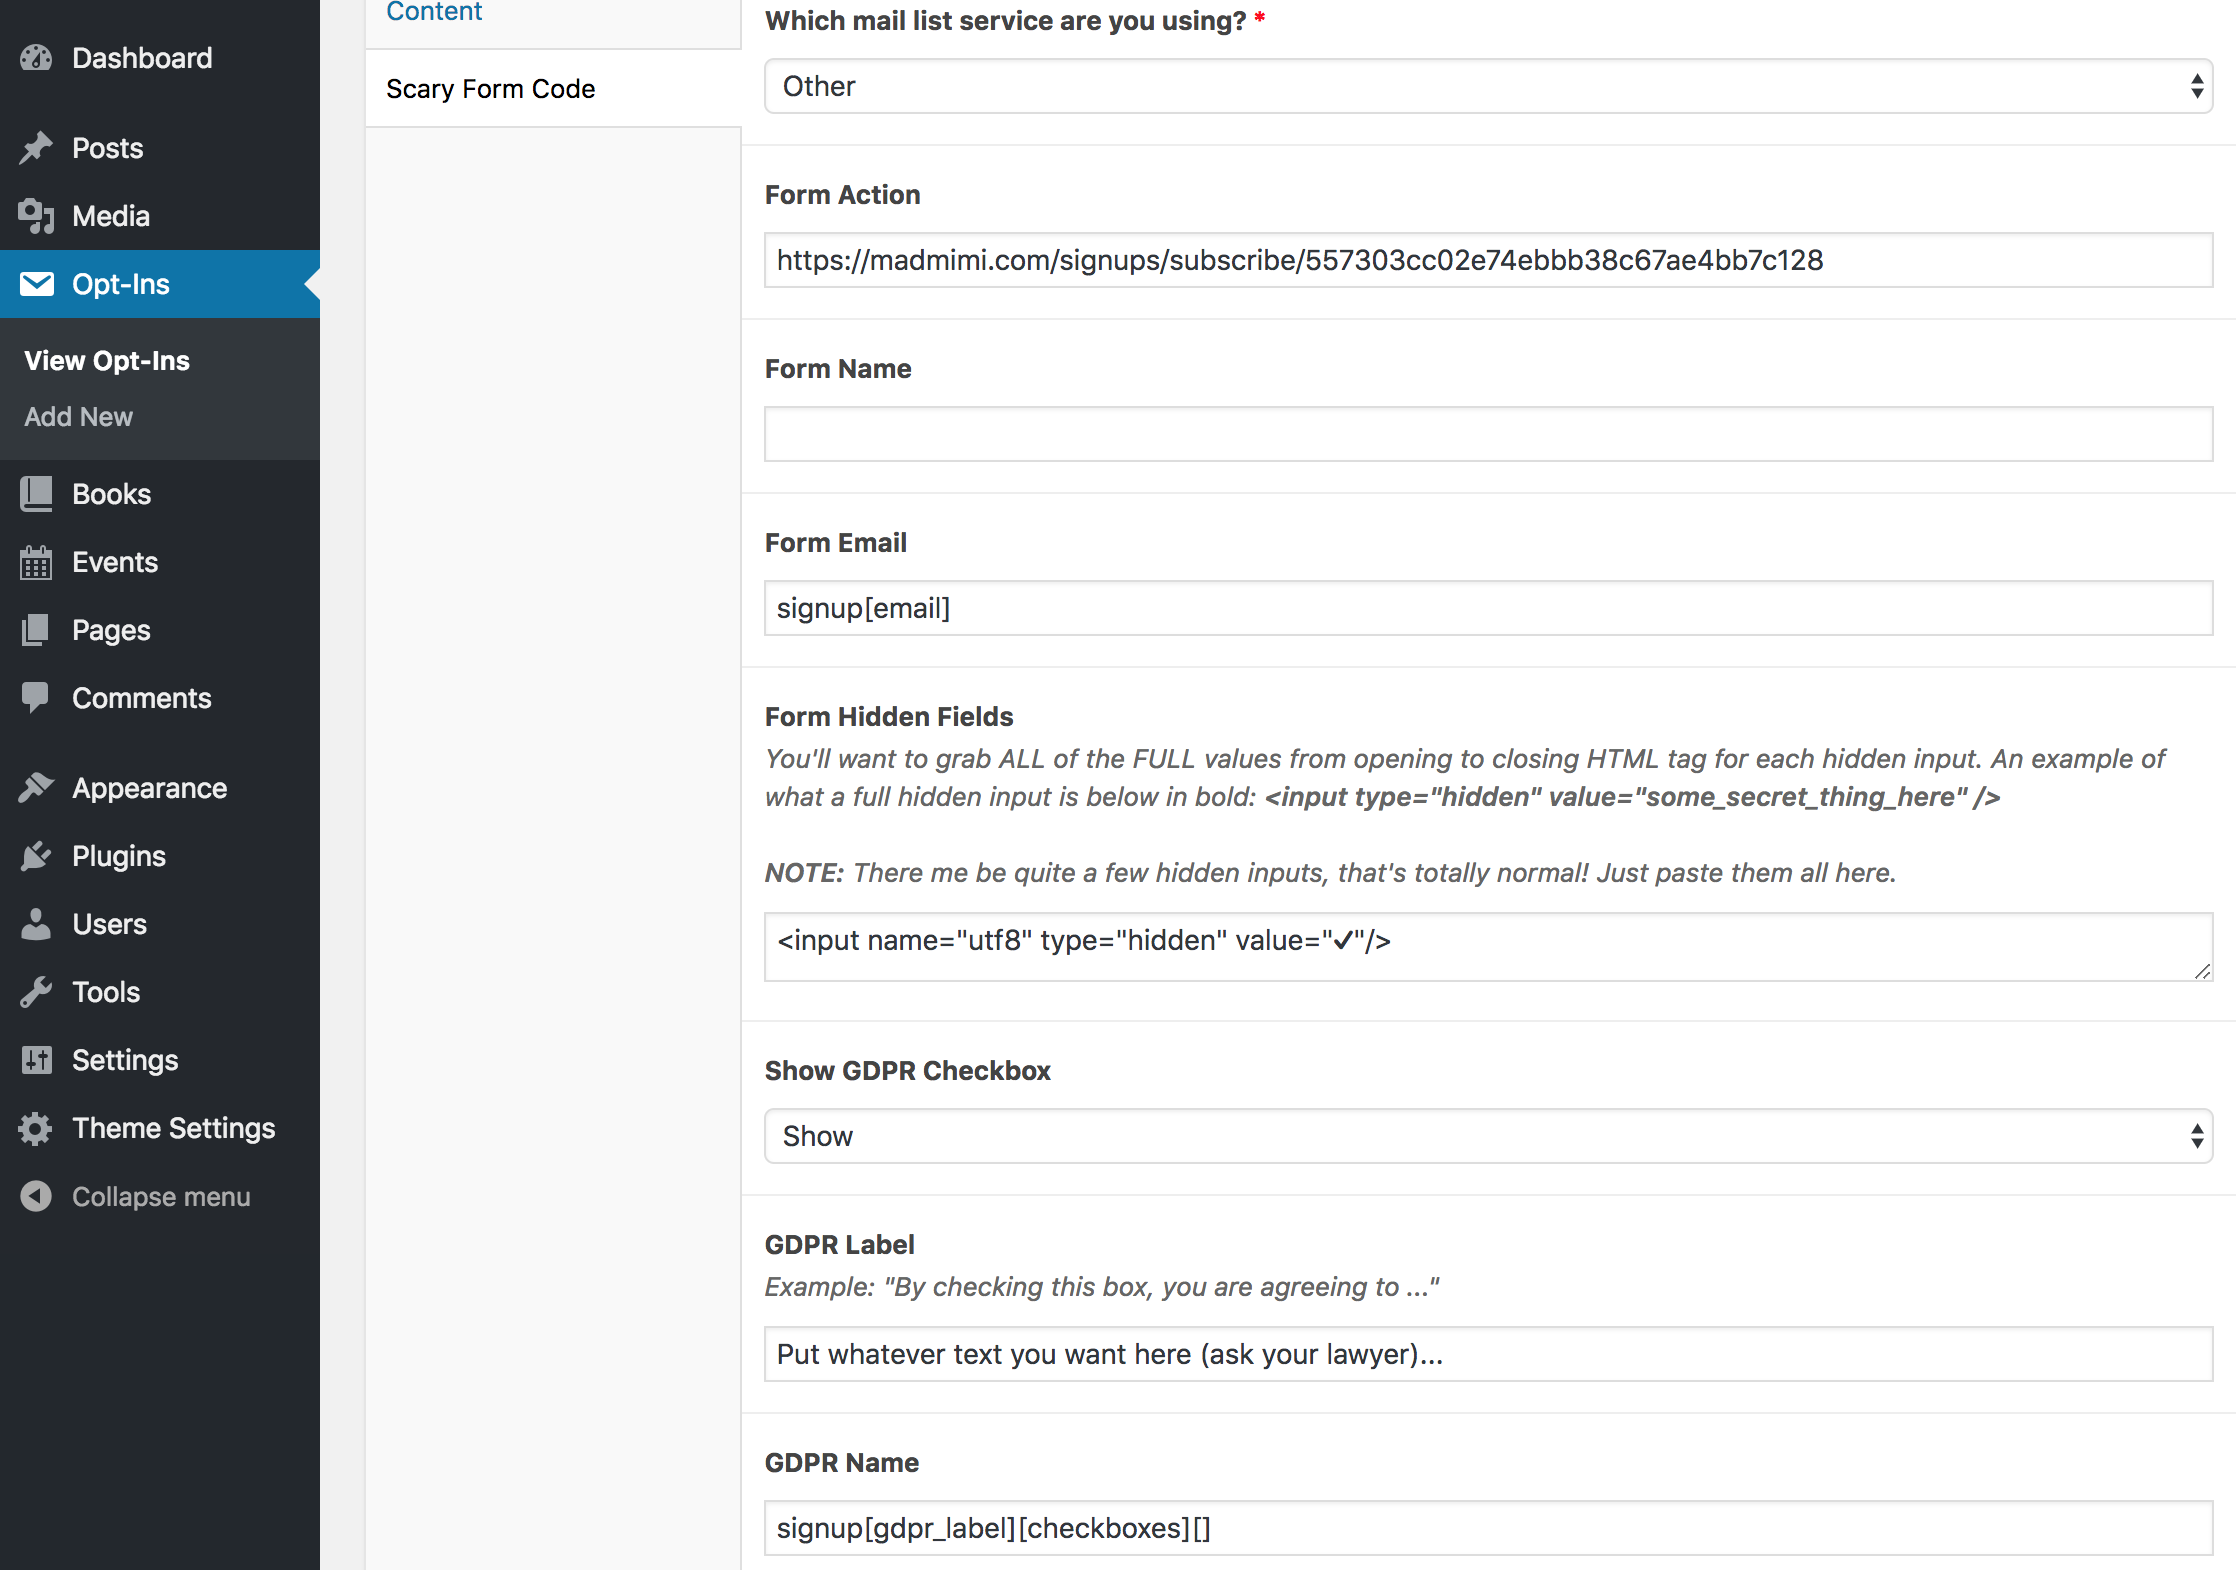
- You’ll need to copy and paste the Form Action Code, Form Name Attribute, Form Email Attribute and Form Hidden Fields from the HTML code provided by Mad Mimi over to the fields in the opt-in you’re creating in the back-end of your site. We’ve highlighted exactly what you need to copy and paste in the first screenshot below.
- If you want to show the GDPR checkbox on your form, then you’ll also want to choose “Show” in your Scary Form Tab in the “Show GDPR Checkbox” dropdown, then add a GDPR Label (Example: I agree to the terms of…) and then finally the GDPR Name, which is highlighted in our example below – your GDPR Name will be different than our screenshot, but that should help you locate your GDPR Name within your form’s HTML code
- Click Save & Exit