
If you’re selling online courses or paid membership content, you’ll want a way to protect that content so that only your paying customers can access it.
There are a few ways to do this:
A quick note: we can’t cover every membership option in this help guide, so we’ve picked three popular options and given you a comprehensive walkthrough. If you’re using a different plugin to the ones we’ve included here, it’s highly likely the setup and process is very similar. If you can’t find the info you need here, we’d recommend reaching out to the plugin’s developer for help (as we can’t support plugins we didn’t build ourselves!).
With that out of the way, let’s jump in…
Password Protect Your Content
Your Nrdly site has password protection built in. Simply edit the pages you’d like to protect and in the “Course” or “Page” tab in the right-hand panel, click on “Visibility” and then select “Password Protected”.

Enter a password of your choice. Then, click “publish” and your pages are now password protected. A message prompting users to enter their password will now replace the content of these pages.
You can set different passwords for different member content (eg – different courses) and then simply email your customers the password after they have purchased your member content.
For each subsequent product the customer purchases, you would email them their new password to access the new content.
However, if you want to be able to control your customers’ access levels – for example, grant them access to different content without needing a new password – or if you want to restrict a customer’s access to a particular product (eg – if they cancel or request a refund) then you will need to use a Membership Plugin to handle this for you.
There are dozens of plugin options, but thankfully they all work similarly. So we’ll cover two popular options in this guide – and if you choose to use a different plugin, you should find the setup is largely the same (and they will also have their own help documentation if you get stuck).
Free Membership Plugin – Paid Members Pro
Paid Membership Pro has a free tier that allows you to take payments from customers using Stripe, Paypal, and several others.
You can configure your membership levels to grant access to one or multiple courses (or other member content).
After payment, Paid Membership Pro will create a user account with the email address provided during checkout, and will email the customer their username and password to access the content they purchased.
You can then remove a customer’s access automatically if a payment is cancelled, missed, or refunded.
You can configure your pricing plans for both one-off payments and subscription payment (eg – monthly fees or payment plans).
Instructions:
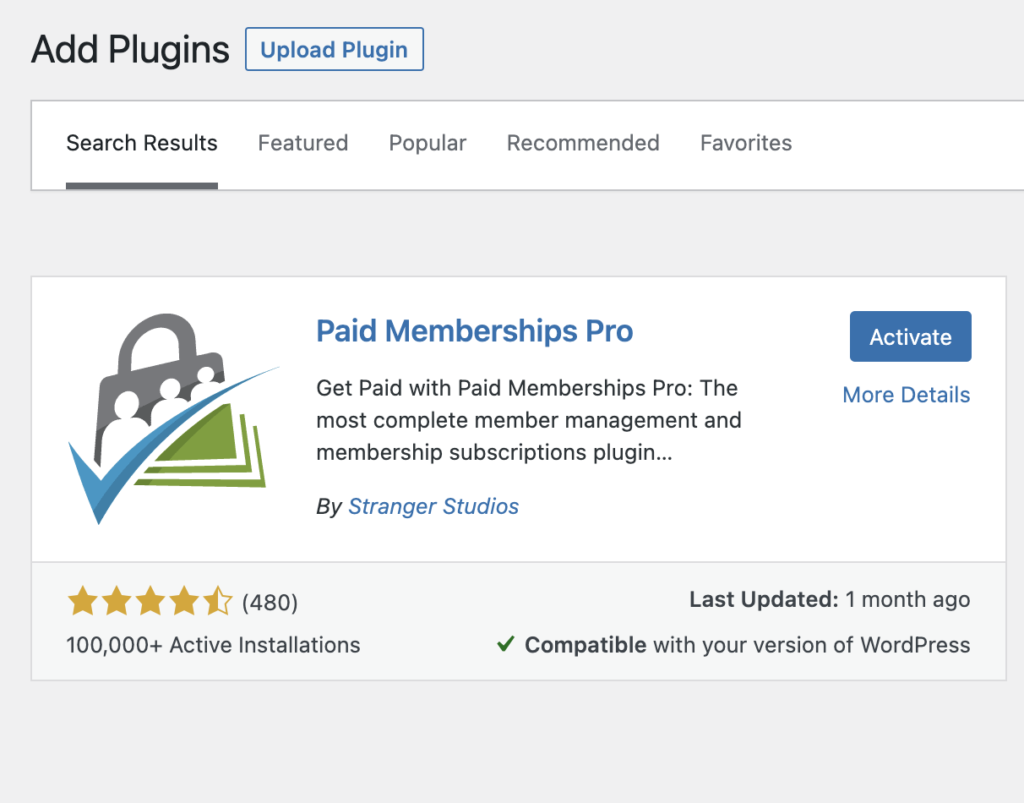
In your website dashboard, navigate to plugins -> add new, then search for “Paid Memberships Pro”. Install the plugin and then click “Activate”.
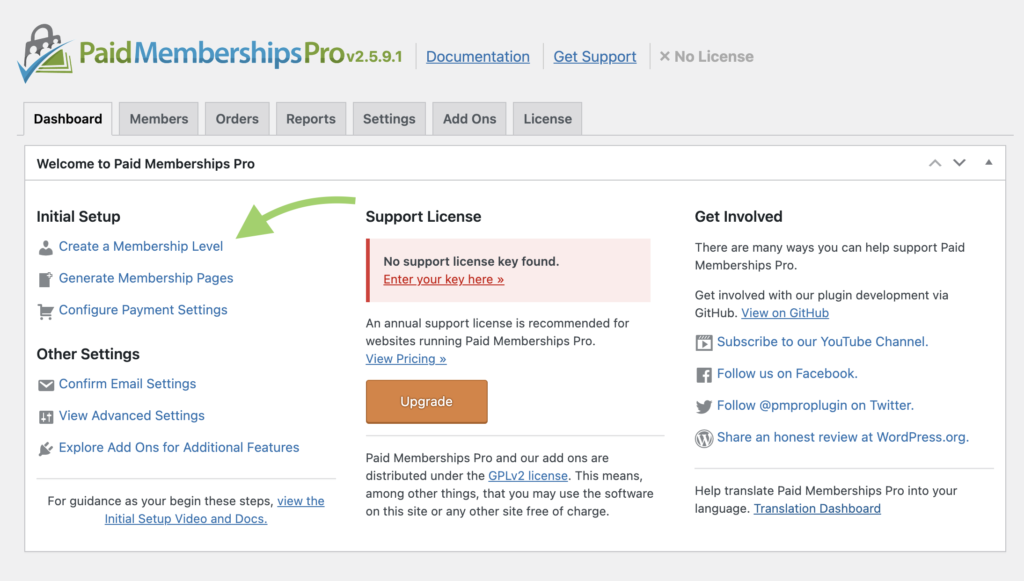
After the plugin is activated, you’ll be taken to the plugin’s settings pages so you can configure your membership levels.
If you are using the free version of Paid Memberships Pro, you will see a notice reminding you that email support is only available if you upgrade to the paid version. If you don’t want to upgrade, you can ignore this message.
First up, you’ll want to create some membership levels to restrict access to your paid content.
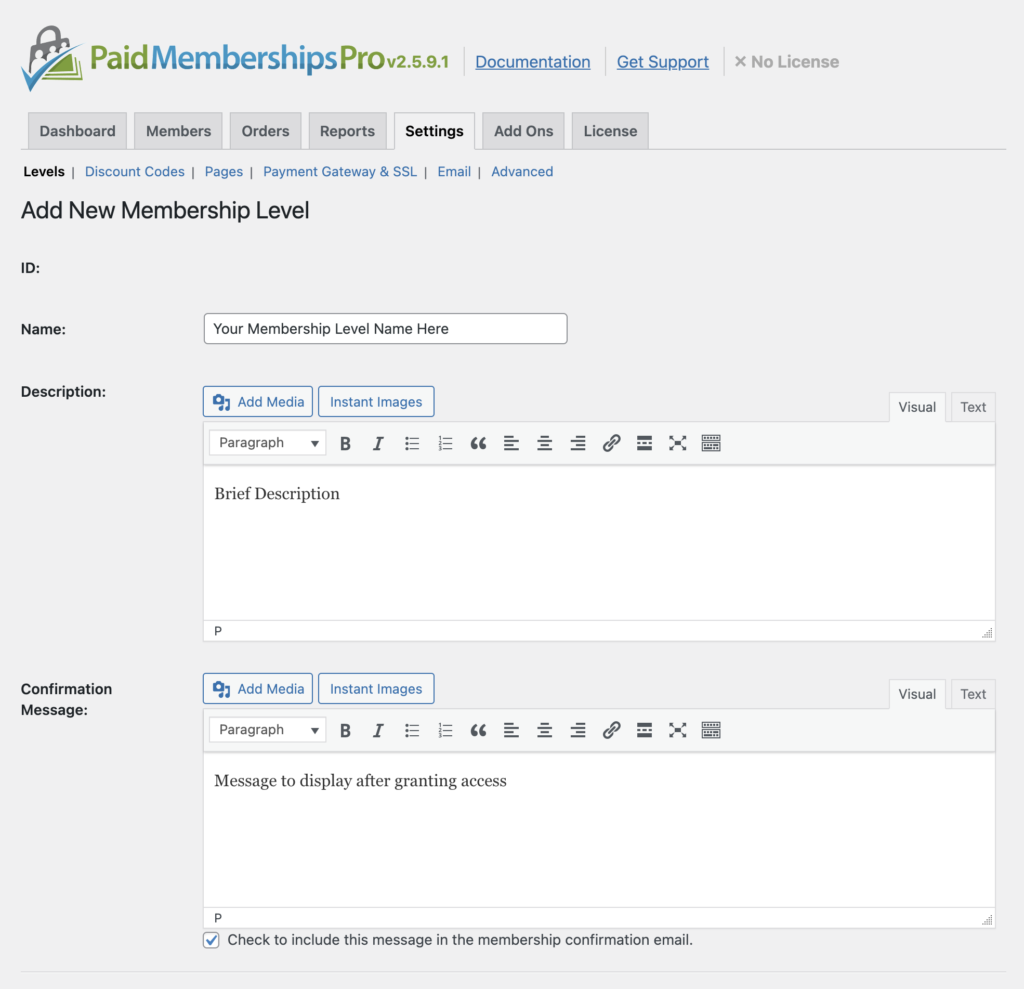
When you create a new membership level, simply fill out the required fields. You’ll want to give each level a sensible name (if you’re selling courses, the name of the course is a good idea for a membership level) and any brief descriptions or confirmation messages you want to include during and after the signup process.
You can also set your billing and pricing options here – either as a one-off payment or as a subscription model. If you want to offer both a one-off AND subscription option (eg – if you’re offering a payment plan) you can create two identical membership levels – one with a subscription payment model, one without. You can also name those levels accordingly, so you can quickly tell the difference in your site back-end.
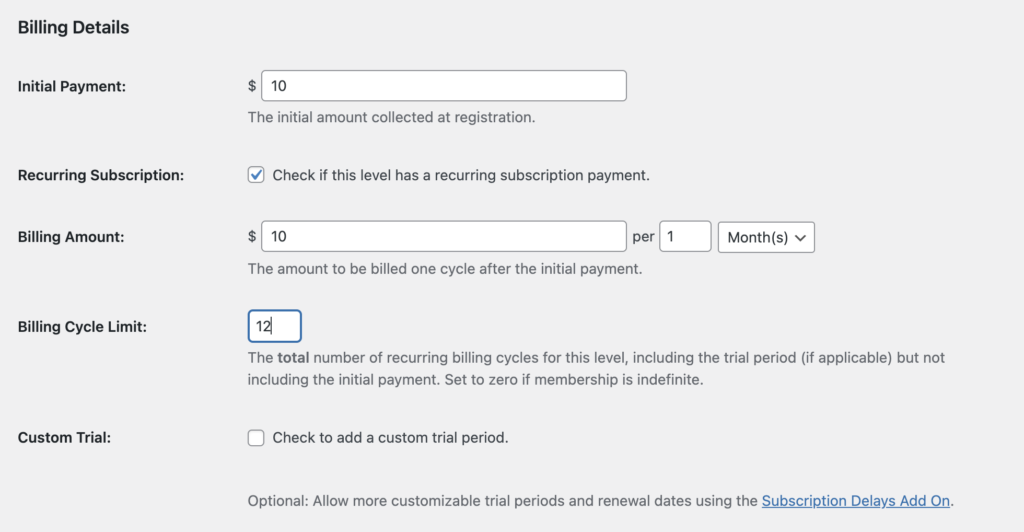
There are other settings on this page, but in most cases you can leave those blank (you can always experiment with them later if you like).
With your membership level created, it’s time to protect your content.
If you are restricting website posts, you can simply select which post categories you’d like to protect with this membership level. However, in all likelihood, you’ll want to use the Nrdly Courses plugin to create your course or membership content and protect those instead.
The Nrdly Courses plugin isn’t supported by Paid Memberships Pro at the categories level, so you will have to manually add some shortcode to each courses page you’d like to protect.
To do this, head on over to the first course page you’d like to protect and click “edit” to open up the visual editor.
Then, add a new “shortcode” block:
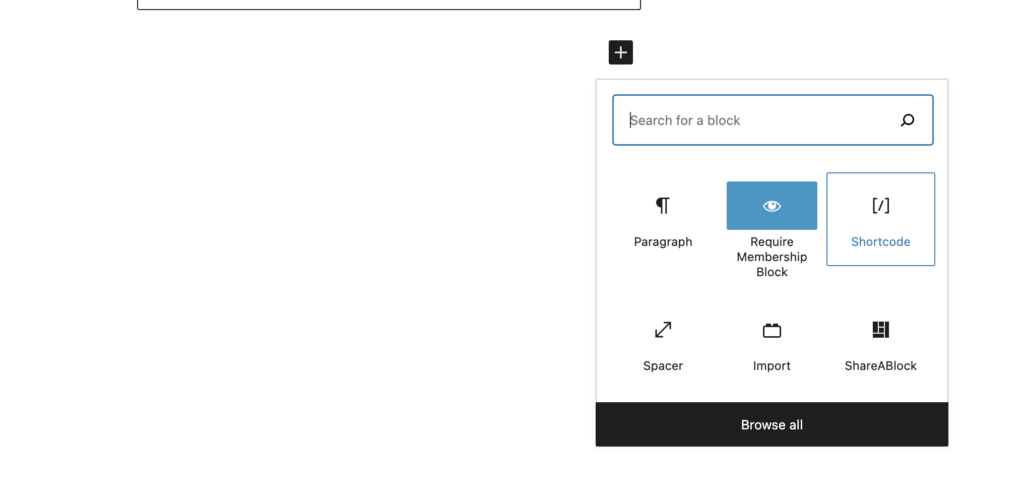
You will need one shortcode block at the top of the page and one shortcode block at the bottom of each page. All content inbetween these two shortcode blocks will be protected from non-members.
Here is the code to add at the top of the page:
[membership level=”Your Membership Level Name Here” show_noaccess=”true”]
Here is the code to add to the bottom of the page:
[/membership level]
When you’re finished, it will look like this:
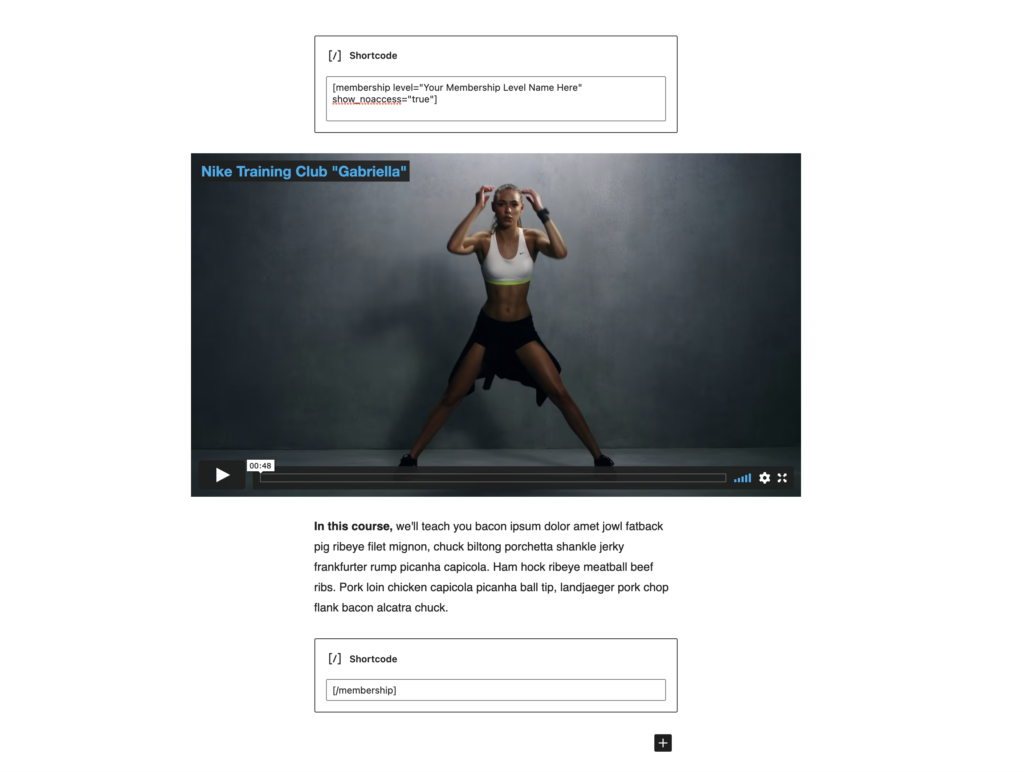
Now, all content between the shortcode blocks will only be visible to members with that particular membership level.
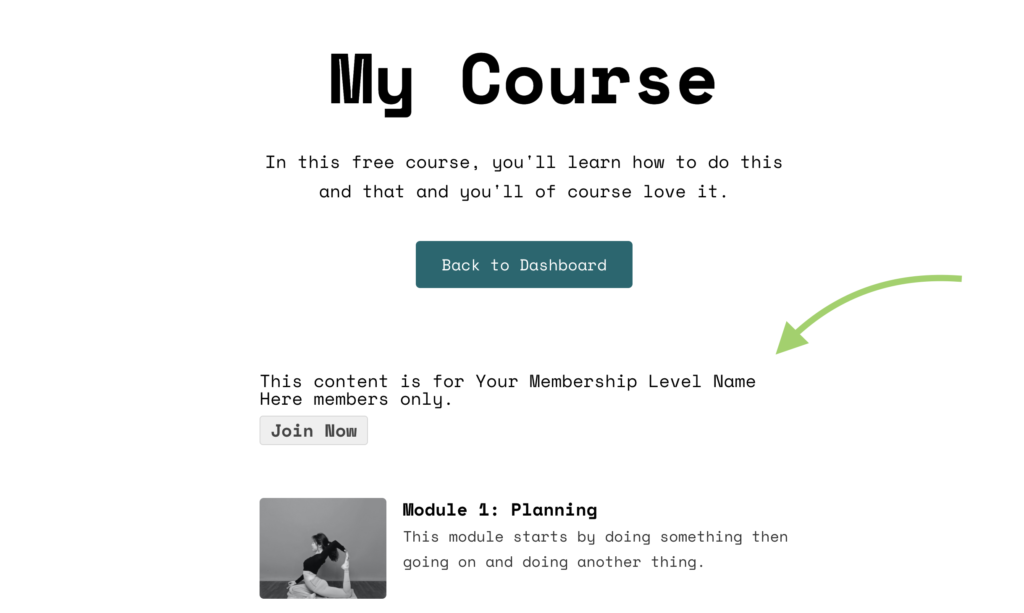
The shortcode will also auto-generate a message prompting non-members to register or pay to gain access.
NB: you may want to add a spacer to the top shortcode block if it appears “squished” when you see the published page.
To finish, you will need to add that shortcode to all course pages you wish to restrict. And voila! You’re all set.
From there, you will need to configure your payment settings so that paying customers are automatically granted access.
And don’t forget to set up a welcome email telling your new customers where to log in and how to find their paid content.
All the steps to do this are provided at the Paid Membership Pro help pages.
You might also want to add some member self-serve pages like a “My Account” page and custom login page. All this is documented for you at the link above.
If you’d prefer not to add shortcode manually to each courses page you’d like to protect, you can upgrade to Paid Memberships Pro PLUS, which will allow you to control access to Custom Post Types by simply checking a box once (which include Nrdly Courses pages – you’ll be able to protect an entire course with one click). More info on that can be found here.
However, this will require upgrading to the paid version. To continue using the free version, you will have to add shortcode manually to each courses page.
If you are considering upgrading to a paid version of Paid Members Pro, you might also want to consider other similarly priced alternatives:
Paid Option – Memberpress
Let’s face it, well all like it when things are free. The downside is – well, free plugins often don’t have all the functionality you need and usually require a lot of manual intervention to get things going.
This is all well and good if you’re just starting out, but as your business (and product catalogue) grows, you might want to consider a premium option to make life a little easier for you day-to-day.
The PLUS version of Paid Memberships Pro is a great option, but we at Nrdly also love Memberpress.
The Memberpress plugin was designed around offering online courses, and has everything you need to get going.
In particular, when you create membership levels in Memberpress, you can assign a Nrdly Course to that level and the protection will filter down to all modules and lessons within that course, too.
Meaning – you simply check a box at the “courses” level and all associated modules and lessons will be protected too (it’s a ten-second job).
To get started, purchase a plan from Memberpress and download the plugin file. Then in your site, navigate to plugins -> add new -> upload. Then select the plugin file you just downloaded and click “Install Now”.

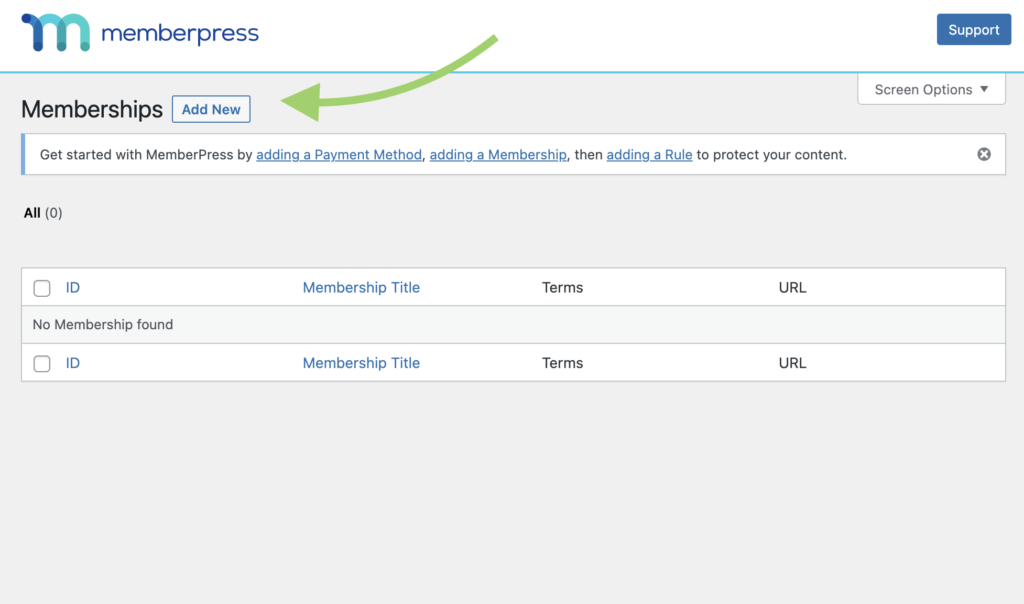
Next, navigate to Memberpress -> settings and activate your license key. Then head on over to Memberpress -> Memberships to create a new Membership level.
Then, give your Membership Level a name (for courses, we usually recommend this is the same name as the course to make life easier for you) and set your pricing.
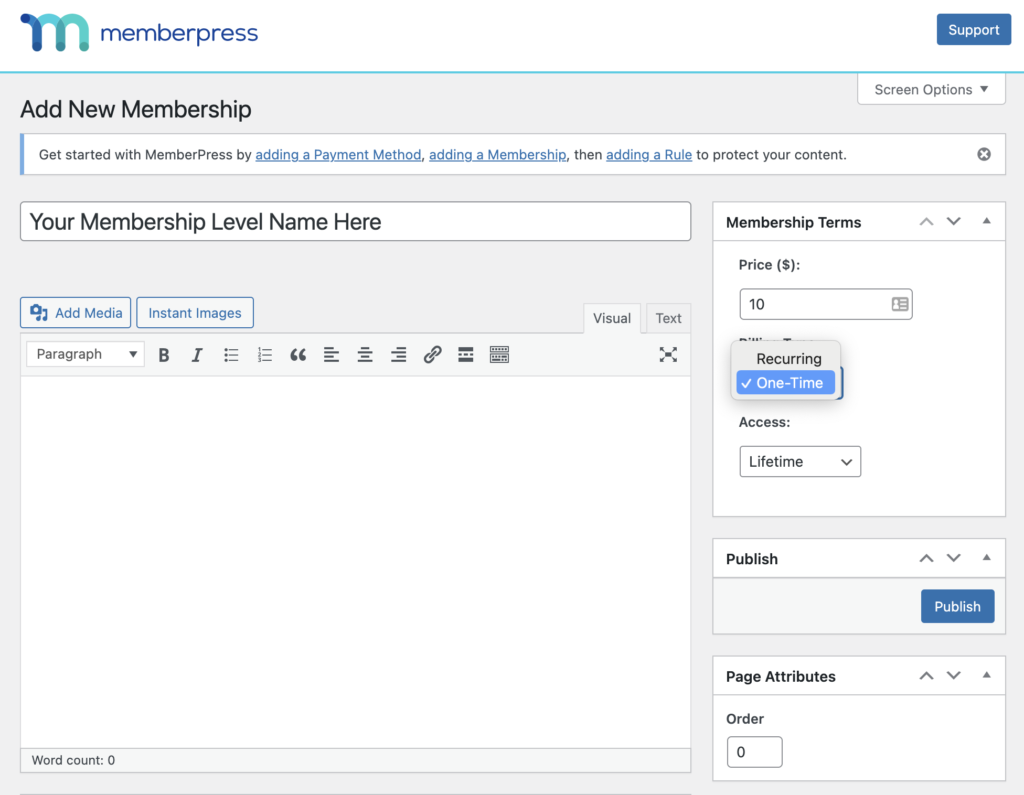
Then hit publish. With your membership level created, it’s time to protect your content.
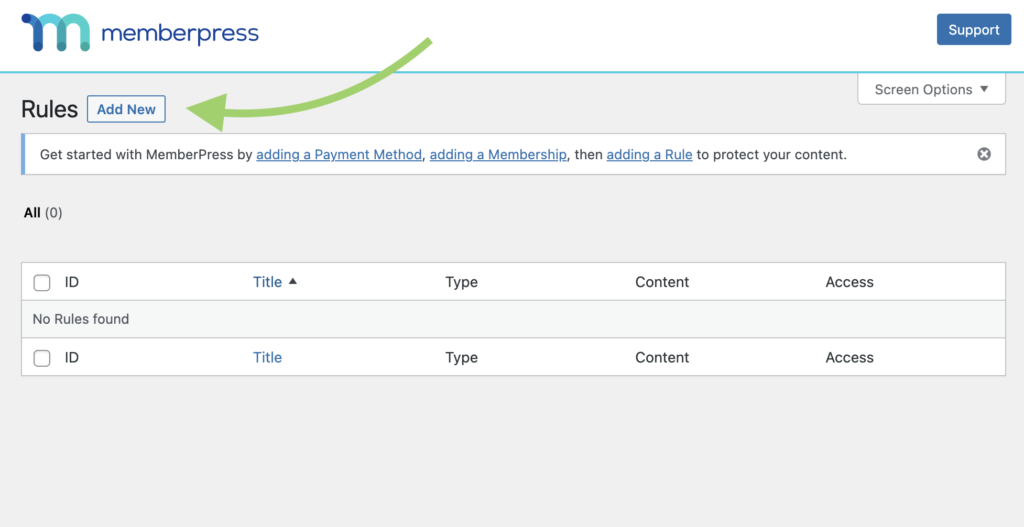
To do this, navigate to Memberpress -> Rules -> Add New
Give your rule a name and select which course you’d like to protect using the drop-down menu. Then assign a membership level to that course (or courses) so that only members of that level can access it.
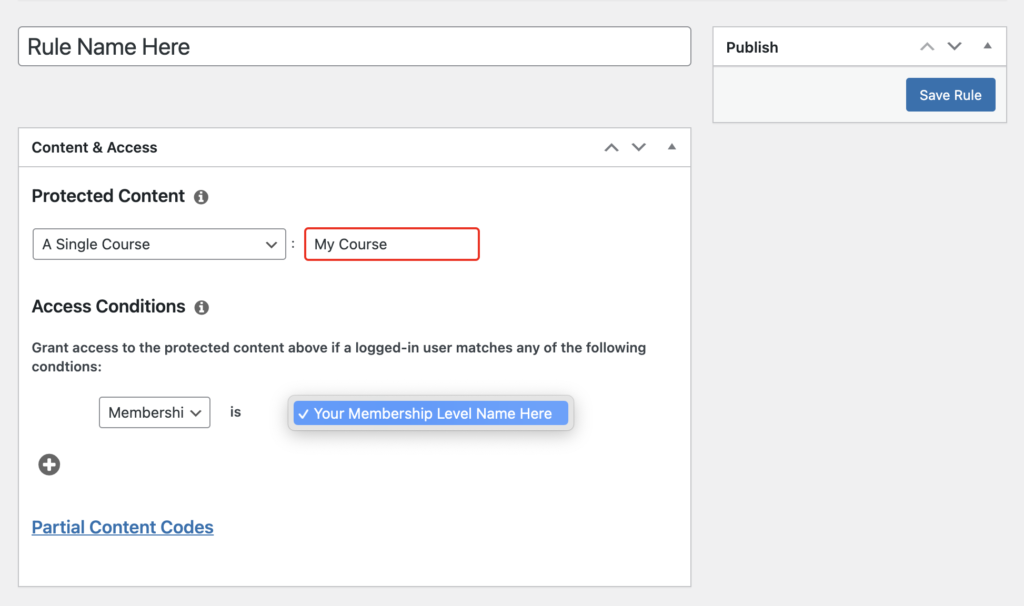
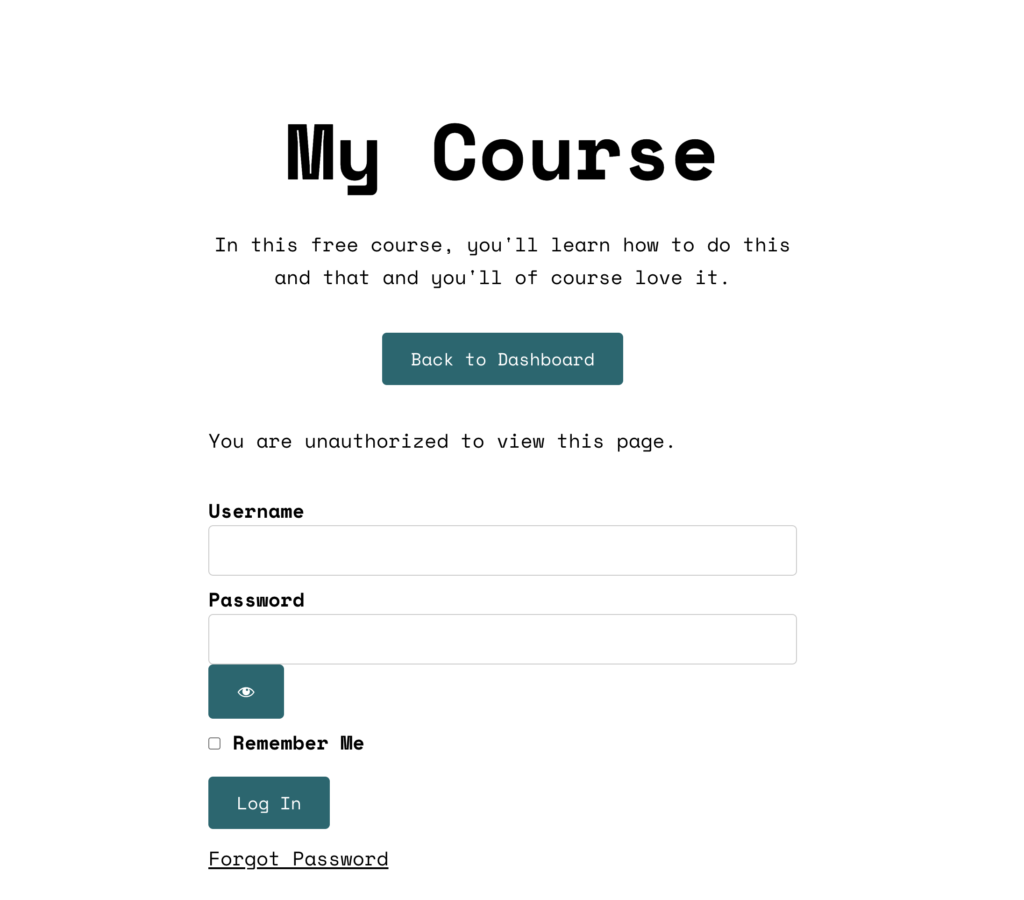
Hit “Save Rule” and Voila! Your course is now protected from non-members. If a non member tries to access this content, they will be prompted to sign in.
If your course has modules and lessons, you can also add a rule to protect all “child courses” (modules and lessons). So you will have 2 rules running.

Which will restrict all modules and lessons listed under that course. You can check this is working by navigating to Courses -> All Courses and checking the membership level has been properly applied:
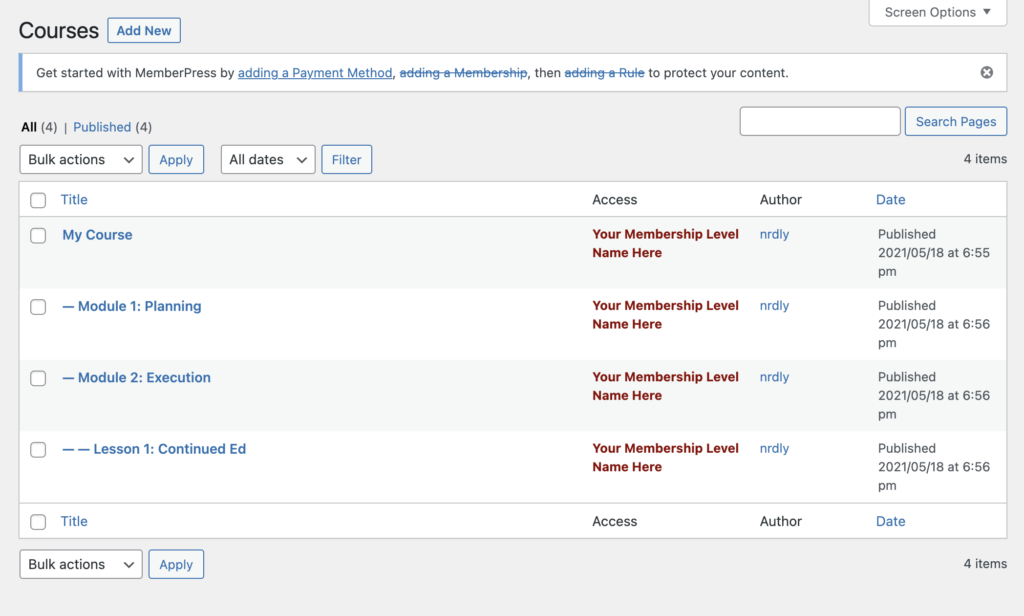
In the screenshot above, you’ll see the Course “My Course” has been protected by the first rule we created. The Modules and Lessons have been protected by applying the second rule, which is for “Child Courses”.
You can, of course, leave the “Course” level unprotected and simply protect the Modules and Lessons if you choose. That means you’re only running 1 rule. But it’s up to you!
Now, all your course content has been protected and assigned to a Membership Level, you will need to configure your payment system to automatically grant access when customers purchase, and configure access restriction if a customer cancels or requests a refund.
How to do this depends on which payment options you configure – and you can find full documentation for how to do all of this at the Memberpress Help Pages.
Please note: as much as we’d love to, Nrdly can’t offer you support with third-party plugins. We didn’t build them and don’t have access to any back-end systems to help you troubleshoot any issues. We’d recommend getting in touch with any third-party plugin developer for help and support directly if you can’t find what you’re looking for in these help guides.